By Emmett Caldwell
A solar hot water system with gas booster uses sunlight to do most of the work of heating your water and a gas burner or tankless unit to make up the difference on cloudy days, in winter, or when demand spikes. In this guide you will learn how the two parts fit together, how to size the solar side, how the booster should be controlled, and what to check before you commit to a layout. The goal is a system that delivers reliable hot water year-round without wasting gas or creating a scald or pressure hazard.
How a Solar Hot Water System With Gas Booster Works
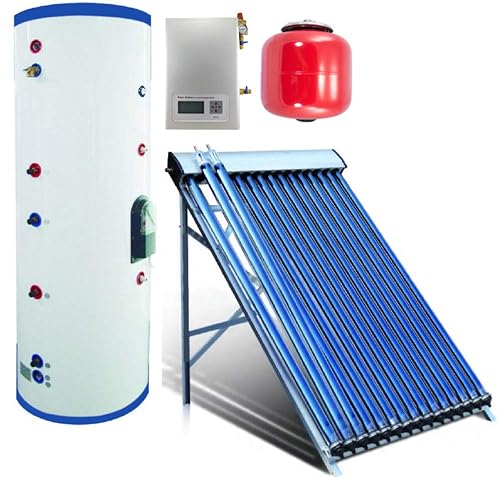
The solar loop collects heat from the sun and transfers it into a storage tank. Water flows from the bottom of the tank through the collector, picks up heat, and returns to the top of the tank. A controller compares the temperature at the collector with the temperature in the tank and runs the pump only when the collector is warmer. This is the same differential control logic used in most active solar water heaters.
Shopping for one? See our guide: 8 Best Solar Hot Water System Off Grid Picks for Homes (2026).
The gas booster sits downstream of the storage tank. Preheated water enters the booster, and the booster raises it to the set point only if it is still below that temperature. On a sunny afternoon the booster may never fire. On a dark January morning it may run for most of the draw. Because the booster only adds the last few degrees of rise, the gas bill is far lower than it would be for a conventional gas water heater with no solar input.
Passive Versus Active Solar Loops
Some setups use a thermosiphon arrangement, where hot water rises naturally into a tank mounted above the collector. Others use a pumped active loop with sensors and a controller. A pumped loop gives you more control over tank placement and flow rate, while a thermosiphon has fewer moving parts. Either can feed a gas booster, but the pumped design is more common when the tank sits in a basement or utility room away from the roof.
Step 1: Estimate Your Hot Water Demand
Before choosing any hardware, measure how much hot water your household actually uses. Count fixtures and their typical use: a shower often draws 8 to 10 gallons, a dishwasher cycle several gallons, and a clothes washer on hot can use a significant volume per load. Multiply by daily events to get a daily total. Use the method in How to Estimate Your Household Hot Water Needs Before Going Solar to get a number you can design around.
Plan for the solar system to cover a large share of that daily volume during average sun hours, and let the gas booster handle the rest. Many designers aim for solar to supply most of the annual load, but the exact fraction depends on your climate and roof. Treat any target percentage as a design goal you verify with local conditions, not a guarantee.
Step 2: Size the Collector and Storage Tank
The collector area and tank volume must match each other. A common rule of thumb for flat plate or evacuated tube collectors is to size the tank so that one day of solar gain can heat most of the daily volume. Storage that is too small will fill and overheat early in the day and then lose heat to the booster by evening. Storage that is too large will take too long to reach useful temperature.
For the tank itself, look at insulation thickness, connection points, and the pressure rating. Details on sizing and safety fittings are covered in Solar Hot Water Storage Tanks: Sizing, Types and Safety Parts. Keep the tank as close to the booster as practical to reduce heat loss in the connecting pipe.
Typical Sizing Relationships
| Household size | Typical daily hot water use (rough) | Storage tank range to evaluate |
|---|---|---|
| 1 to 2 people | Roughly 20 to 40 gallons | 40 to 60 gallons |
| 3 to 4 people | Roughly 40 to 70 gallons | 60 to 80 gallons |
| 5 or more people | Roughly 70 gallons and up | 80 gallons and up, or two tanks |
These figures are starting points only. Your actual demand, water temperature, and climate will shift the numbers. Confirm with a site-specific calculation before buying equipment.
Step 3: Choose the Gas Booster Type
There are two common booster arrangements. A tankless gas water heater placed after the solar tank is the most compact option and fires only when water flows. A storage gas water heater placed after the solar tank works as a second tank and can hold a reserve, though it adds standby losses. Either must be rated for the incoming water temperature from the solar tank, which will often be well above cold supply temperature.
Check the minimum flow rate your booster needs to ignite. Solar-preheated systems can see flow patterns that differ from standard installs, so confirm the unit will modulate correctly at your expected draw rates.
Step 4: Plan the Piping and Controls
Lay out the solar loop with the collector feed at the bottom of the tank and the return at the top. Use insulated copper or PEX rated for the temperatures involved, and check that the material matches the fluid and pressure in your loop. The booster should connect to the cold side of the solar tank’s outlet, with a tempering valve placed where it can protect the fixtures.
Scalding is a real risk when stored solar water is hot. Install a thermostatic mixing valve set to a safe delivery temperature and verify it with a thermometer at a tap. The guide Preventing Scalding From Solar Hot Water: Tempering Valves and Settings walks through settings. Pressure relief valves and expansion provisions are also required; see Pressure and Temperature Safety in Solar Water Heaters.
Controller Logic for the Booster
- Set the booster to fire only when the outlet from the solar tank falls below the target temperature.
- Avoid a booster setting that is higher than the tempering valve can safely mix down.
- Use the booster’s own temperature sensor as the final check, not the solar controller alone.
- Confirm the booster does not cycle rapidly when a small faucet is open.
Step 5: Install, Test, and Commission
Follow a checklist before first fill. Each step reduces the chance of a leak, air lock, or dry fire.
- Pressure test the solar loop and the cold supply lines with water before insulating.
- Flush the solar loop and fill it with the correct heat transfer fluid or water as the design specifies.
- Bleed air from high points in the loop and confirm the pump circulates.
- Verify the solar controller reads the collector and tank sensors correctly.
- Check the booster’s gas supply pressure, venting, and combustion air per the manufacturer.
- Test the tempering valve at a tap and record the outlet temperature.
- Insulate all exposed hot piping and the tank.
Tools and Materials Checklist
- Pipe cutter, deburring tool, and press or solder tools for your piping material
- Pressure gauge and test pump for leak testing
- Digital thermometer for verifying tap temperature
- Pipe insulation rated for hot water and outdoor exposure if needed
- Thermostatic mixing valve, check valves, and isolation valves
- Expansion tank rated for the solar loop pressure
- Gas line leak detection solution and manometer for gas pressure checks
Common Mistakes
- Undersized storage. A small tank overheats by midday and pushes too much heat into the booster-fed side, reducing solar fraction.
- Skipping the tempering valve. Solar tanks can exceed safe tap temperatures on sunny days.
- Booster set too high. A high set point keeps the gas burner firing even when solar could have covered the load.
- Poor insulation on connecting pipe. Long uninsulated runs between tank and booster leak heat before it reaches fixtures.
- Ignoring water quality. Scale builds faster at higher temperatures. See Water Quality and Scaling in Solar Water Heaters.
- Freeze exposure. Outdoor solar loops need freeze protection in cold climates; review Winterizing a DIY Solar Water Heater: Freeze Protection Options.
Tips for Better Performance
- Orient collectors toward the equator and tilt them near your latitude for year-round output.
- Keep collectors clear of shade from trees and nearby structures during the hours that matter most.
- Check the site before installation; Site Assessment for a Solar Water Heater: Sun, Shade, Roof and Space covers the details.
- Review local permit requirements early. Solar Water Heater Codes, Permits and Professional Review outlines what to expect.
- Consider a budget or premium design path only after you have confirmed the solar fraction you need, since the right collector type depends on climate and roof.
Recommended gear
A digital thermometer makes it easy to confirm that your tempering valve is delivering safe water. Choose one with a probe that fits a tap or a thermowell.
A pressure test pump lets you check the solar loop and cold lines before insulating, which is much easier than finding a leak afterward.
A thermostatic mixing valve protects users from scalding when the solar tank runs hot. Look for one rated for solar temperatures and check its flow range.
FAQ
Does a gas booster defeat the purpose of solar?
No. The booster only adds heat when the solar tank cannot reach the set point. A well-designed system uses far less gas than a conventional gas heater because the booster starts from a preheated supply.
How much solar output do I need to make the system worthwhile?
That depends on your demand, climate, and roof. Use your daily hot water estimate and local sun data to set a solar fraction target, then size the collector to match.
Can I use a tankless booster with a solar tank?
Yes, a tankless unit is a common pairing. Confirm it accepts the inlet temperature from the solar tank and that its minimum flow rate suits your fixtures.
Do I need a tempering valve?
In most cases, yes. Solar storage can exceed safe tap temperatures, and a thermostatic mixing valve is the standard way to limit delivery temperature.
What maintenance does the system need?
Check the heat transfer fluid or water quality on schedule, inspect pressure relief and expansion components, clean collector glazing, and have the gas booster serviced according to the manufacturer.
Is a permit required?
Often yes, especially for gas work and roof-mounted collectors. Local codes vary, so check with your building department and consider professional review for gas and structural elements.
Can I do this as a DIY project?
Plumbing and solar loop work are within reach for experienced DIYers, but gas connections should be handled by a licensed professional. Consult a qualified installer for anything involving gas, electrical controls, or roof loading.
Conclusion
A solar hot water system with gas booster combines the free heat of the sun with a gas backup that only runs when needed. Start with an honest demand estimate, size the collector and tank to match, and choose a booster whose controls and flow range suit your layout. Test every safety component, especially the tempering valve, before you rely on the system for daily use.
Ready to choose one?

About Emmett Caldwell
Emmett covers solar water heaters, comparing specs, features and long-term owner feedback to help readers choose with confidence.