By Emmett Caldwell
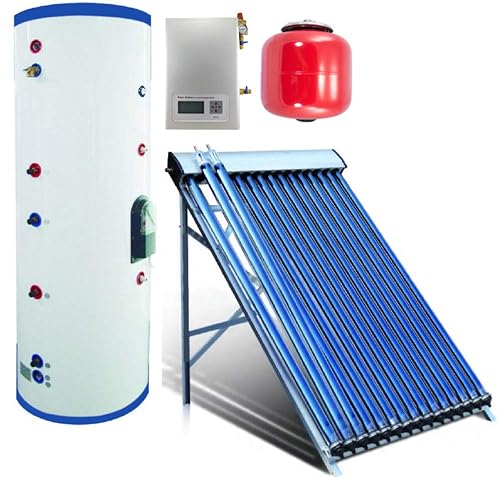
An AquaMax solar hot water system is a solar thermal setup that uses roof-mounted collectors to heat water before it reaches your conventional water heater or storage tank. This guide walks you through how the AquaMax solar hot water system is generally configured, how to estimate the hardware you need, how to plan the site, and what to check before and after installation. The goal is to leave you with a clear picture of whether this type of system fits your home and what the install steps look like in practice.
Before going further, a note: solar thermal work involves roof access, pressurized water, and sometimes electrical connections. Confirm local code requirements and consider having a licensed plumber, electrician or solar installer review the design, especially for anything connected to your home’s potable water supply.
Shopping for one? See our guide: 8 Best Solar Hot Water System Off Grid Picks for Homes (2026).
What the AquaMax Solar Hot Water System Does
At its core, a solar hot water system moves heat from the sun into a fluid or directly into potable water, then stores that heat in a tank. The AquaMax name is used for solar hot water equipment sold in several configurations, so always check the manufacturer’s manual for your specific model’s flow rates, pressure limits and freeze-protection method. The general principles below apply to most closed-loop and indirect solar water heating designs.
A typical arrangement includes:
- Collectors mounted on the roof, facing south in the Northern Hemisphere, that absorb sunlight.
- A storage tank that holds heated water until you need it.
- A circulation loop (pumped or passive) that moves heat from the collectors to the tank.
- A controller that decides when to run the pump based on temperature differences.
- An auxiliary heater, either gas, electric or a heat pump, that tops up the tank when solar input is not enough.
For a deeper look at how collectors differ, see Solar Water Heater Collectors: Batch, Flat Plate and Evacuated Tube. For storage choices, Solar Hot Water Storage Tanks: Sizing, Types and Safety Parts covers tank types in detail.
Step 1: Estimate Your Hot Water Demand
Sizing starts with how much hot water your household uses. Measure or estimate daily use in gallons or liters at your preferred delivery temperature, usually around 120°F (49°C). A common rule of thumb is roughly 15 to 25 gallons per person per day for typical residential use, but your own habits matter more than averages. Showers, dishwashers and laundry usually account for most of the load.
Once you have a daily figure, you can estimate the collector area and storage volume. The detailed method is covered in How to Estimate Your Household Hot Water Needs Before Going Solar.
Checklist: Demand Data to Gather
- Number of occupants and typical showers per day.
- Dishwasher and washing machine cycles per week, and whether they use hot water.
- Current water heater size and fuel type.
- Peak-use times, such as morning showers.
- Incoming cold water temperature for your region, which is lower in winter.
Step 2: Evaluate the Site
Site quality determines how much heat you actually collect. Look for a roof or mounting area that gets direct sun for most of the day, ideally from about 9 a.m. to 3 p.m. in winter. Trees, neighboring buildings and chimneys can cast shadows that cut output more than you might expect.
| Factor | Target | Why It Matters |
|---|---|---|
| Orientation | South-facing (Northern Hemisphere) | Maximizes annual solar gain |
| Tilt | Near your latitude, often adjusted for winter use | Balances summer and winter output |
| Shading | Minimal from 9 a.m. to 3 p.m. | Shade reduces collector temperature and output |
| Roof structure | Adequate load capacity | Filled collectors and water add significant weight |
| Pipe run | As short as practical | Shorter runs lose less heat and reduce friction |
Check structural capacity before mounting anything. See Roof and Structural Safety for Solar Water Heaters for load and fastening guidance.
Step 3: Plan the Layout and Materials
Draw the system before buying parts. Mark the collector location, tank location, pipe route, pump location, and where the auxiliary heater connects. Keep the tank as close to the collectors and as close to the points of use as your home allows.
Tools and Materials Checklist
- Collector mounting brackets and roof flashing kit
- Copper or PEX-rated piping for the solar loop, with insulation rated for high temperatures
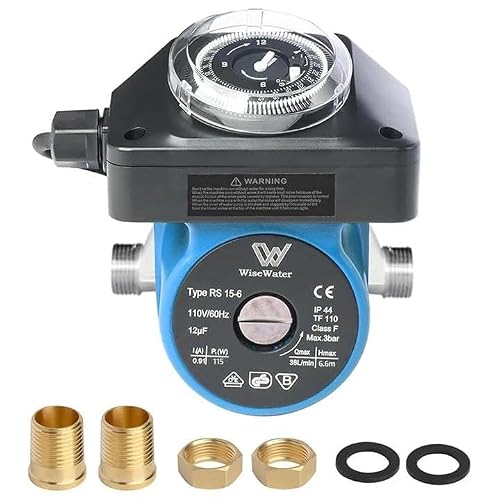
- Circulation pump rated for the loop fluid and temperature
- Differential temperature controller with two sensors
- Expansion tank and pressure relief valve rated for your system pressure
- Air vent and drain valve at high and low points
- Thermostatic mixing valve to limit delivery temperature
- Pipe cutter, deburring tool, torch or press tool as needed
- Multimeter, pressure gauge and thermometer for commissioning
Piping materials and insulation choices are discussed in Piping for Solar Water Heaters: Materials, Insulation and Layout.
Step 4: Mount the Collectors
- Locate rafters. Find structural members and mark attachment points.
- Install flashing first. Seal penetrations before setting brackets.
- Set brackets level and square. Check the tilt angle with a digital level.
- Mount collectors following the manufacturer’s torque and spacing specifications.
- Connect headers with flexible or rigid connectors as the design requires, leaving room for thermal expansion.
Sub-step: Protect Against Thermal Expansion
Solar collectors can reach very high temperatures on still, sunny days. Leave expansion allowance in the piping and confirm that the mounting hardware is rated for the temperature range. Do not let collectors sit in direct sun while the system is open and empty.
Step 5: Install the Loop, Pump and Controller
Route the solar loop from the collector outlet down to the tank heat exchanger or coil, then back to the collector inlet. Use a pump sized for the flow your collectors specify. Install the controller with one sensor on the collector outlet and one near the bottom of the tank. The controller starts the pump when the collector is a set number of degrees warmer than the tank, usually a few degrees to start and a smaller difference to stop.
How differential control works in practice is explained in Solar Water Heater Controls and Sensors: How Differential Control Works.
Sub-step: Fill, Purge and Pressure Test
- Close all valves and fill the loop with the specified heat-transfer fluid through the fill port.
- Open air vents and run the pump briefly to purge trapped air.
- Pressurize to the manufacturer’s cold fill pressure and hold for the recommended period.
- Check every joint for leaks before insulating.
Step 6: Set Up Safety and Temperature Controls
Solar systems can deliver water hotter than a household needs. A thermostatic mixing valve set to a safe delivery temperature, commonly around 120°F (49°C) for general use, protects against scalding. Include a temperature and pressure relief valve on the tank as required by code. Overheating protection, such as a high-limit switch or drain-back design, handles stagnation periods.
Read Preventing Scalding From Solar Hot Water: Tempering Valves and Settings before finalizing settings. For valve selection, Best Thermostatic Mixing Valves for Solar Hot Water: 5 Compared lists options to compare.
Step 7: Commission and Monitor
After installation, run the system through a full commissioning check:
- Confirm the pump starts when collector temperature exceeds tank temperature by the set difference.
- Verify flow direction and that no air remains in the loop.
- Measure delivery temperature at the faucet after the mixing valve.
- Check the auxiliary heater engages correctly on cloudy days.
- Record initial readings so you can spot performance drops later.
If the tank water stays cooler than expected, see Solar Water Heater Temperature Problems: Too Cold or Too Hot for troubleshooting.
Common Mistakes
- Undersizing the collector area for the household’s real demand, leaving the auxiliary heater running most of the time.
- Skipping shade analysis, then discovering a tree blocks the morning sun.
- Using the wrong pipe or insulation that degrades at stagnation temperatures.
- Ignoring water quality. Hard water scales heat exchangers and reduces efficiency. See Water Quality and Scaling in Solar Water Heaters.
- Leaving no freeze protection in climates with winter temperatures below freezing. Review Winterizing a DIY Solar Water Heater: Freeze Protection Options.
- Skipping permits. Check Solar Water Heater Codes, Permits and Professional Review before starting work.
Tips for Better Performance
- Insulate all exposed piping, including fittings and valves.
- Clean collector glazing periodically, especially in dusty or pollen-heavy areas.
- Log tank temperature weekly for the first season to establish a baseline.
- Keep the auxiliary heater thermostat set at a level that does not fight the solar input.
- Compare your setup against published sizing guides before adding capacity.
Recommended gear
Pipe insulation rated for high temperatures is one of the highest-value supplies for a solar loop, since heat lost in exposed piping directly reduces what reaches the tank. View on Amazon
A digital inclinometer or angle finder helps you set collector tilt accurately during mounting, which affects seasonal output. View on Amazon
A digital thermometer with a probe lets you check tank and delivery temperatures during commissioning and monitoring. View on Amazon
A pressure gauge rated for your loop’s fill pressure is necessary for the pressure test and for ongoing checks of the expansion tank. View on Amazon
FAQ
Is an AquaMax solar hot water system suitable for DIY installation?
Some homeowners with plumbing and roofing experience complete parts of the work, such as piping and mounting, but structural, electrical and potable-water connections should be reviewed by a licensed professional. Local permits often apply.
How much roof space do I need?
It depends on your hot water demand and collector model. Calculate the required collector area from your daily use and the manufacturer’s performance data, then confirm the layout fits your roof with proper spacing.
Will the system work in cold climates?
It can, but freeze protection is essential. Options include closed-loop glycol systems, drain-back designs and automatic drain-down controls. Verify the method matches your local winter low.
What happens on cloudy days?
The auxiliary heater supplies the remaining heat. A well-sized system relies on backup less often, but it should always be able to meet demand alone.
Do I need a thermostatic mixing valve?
Yes, in most installations. A mixing valve limits delivery temperature at the tap and protects against scalding when the tank runs hot.
How often should I maintain the system?
Check fluid level and pressure at least once a year, inspect for leaks, clean the collector glazing as needed, and confirm the controller and pump operate correctly.
Why is my tank water cooler than expected?
Common causes include shading, low pump flow, air in the loop, a faulty sensor, or an undersized collector area. Start by checking the controller readings and pump operation.
Conclusion
The AquaMax solar hot water system can supply a large share of household hot water when it is sized, sited and installed correctly. Start with an honest estimate of demand, confirm the roof and shading conditions, and follow the manufacturer’s specifications for loop design and freeze protection. Have a licensed professional review anything connected to your potable water or electrical supply.
Ready to choose one?

About Emmett Caldwell
Emmett covers solar water heaters, comparing specs, features and long-term owner feedback to help readers choose with confidence.