By Audrey Hayes
Updated November 2026
A camping solar hot water system uses a small solar collector, an insulated storage tank and a few simple plumbing parts to heat water for showers, dishes and handwashing while you’re off the grid. In this guide you’ll learn how the system works, how to size it for your trip, which components to buy, and how to set it up so it runs reliably without a generator. The approach here is aimed at portable or vehicle-mounted setups, which differ in some important ways from the rooftop systems used on homes.
How a Camping Solar Hot Water System Works
Most portable setups use one of two designs. A batch or integrated storage heater places a water tank inside a glazed box so the sun heats the water directly. A flat-plate or evacuated-tube collector pumps water (or a heat-transfer fluid) through tubes in the sun and into a separate tank. Both rely on the same principle: dark surfaces absorb sunlight, the absorbed heat moves into the water, and insulation keeps it there until you need it.
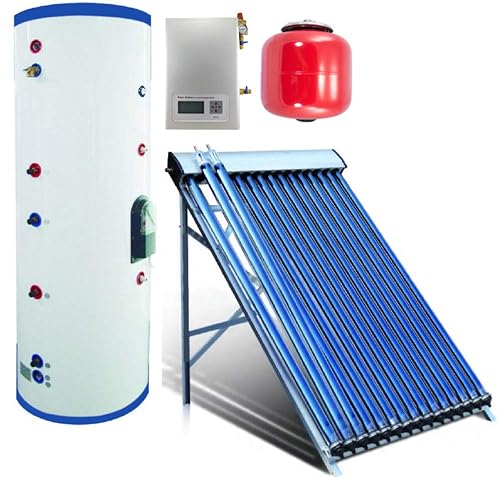
Shopping for one? See our guide: 6 Best Indirect Solar Hot Water System Options for Homes (2026).
For camping, the batch design is easier to understand and cheaper to build, but it has limits. It heats water only as well as the day allows, and it loses heat overnight. A pumped collector with a separate insulated tank can deliver more consistent results but adds components that can fail. Many DIY builders start with a simple batch heater and add pumping later if they need it.
Step 1: Decide How Much Hot Water You Need
Sizing comes first because it determines everything else. Use these rough per-use estimates as a starting point:
- Hand washing or dishes (one person): about 2 to 4 gallons per day
- A five-minute shower at a low-flow head: about 5 to 10 gallons
- A full dish-washing session for two people: about 3 to 5 gallons
For a two-person camp with one shower per day and some dishes, plan on roughly 15 to 20 gallons of stored hot water. Storage capacity should be at least one day’s use, because cloudy weather will cut your output. If you camp in overcast regions, plan for more.
Step 2: Gather the Materials and Tools
A basic batch-style build for camping typically needs:
- One food-grade, insulated tank or a black-painted tank with a glazed enclosure
- A tempered glass or polycarbonate glazing sheet, sized to cover the collector area
- Dark absorber material (black-painted metal or a black hose coil)
- Insulation: rigid foam board or reflective insulation for the box sides and bottom
- Weatherproof sealant, screws and aluminum or stainless framing
- Flexible hose, hose clamps, a check valve and fittings matched to your water supply
- A thermal or mixing valve to prevent scalding at the tap
- Tools: drill, jigsaw, caulking gun, measuring tape, level and a pressure gauge for testing
Choose materials rated for your local UV and temperature range. Anything that will sit in direct sun for months should be UV-stable.
Step 3: Build or Mount the Collector
Measure and frame the box
Build the enclosure so the glazing faces the sun at an angle close to your latitude, or at least a tilt of 30 to 45 degrees for most of the continental US. Keep the frame shallow enough that it fits your vehicle’s roof rack or sits securely on the ground.
Insulate and seal
Line the box sides and bottom with rigid foam. Leave a small air gap between the insulation and the absorber so the heat stays in the collector area. Seal every seam with exterior-grade caulk, because water that gets behind the foam will reduce efficiency fast.
Install the absorber and tank
Place the black tank or absorber coil inside the glazed area. If you’re using a coil, keep the tubing spacing consistent so water flows evenly and doesn’t trap air bubbles.
Step 4: Plumb the System Safely
Connect the cold-water inlet to the bottom of the tank and the hot outlet to the top. Install a check valve on the cold line so water doesn’t back-flow when you disconnect the supply. Add a pressure relief valve if your tank is closed, because heated water expands and needs somewhere to go.
Fit a thermal mixing valve between the hot output and your faucet or shower. Water in a closed tank in direct sun can exceed 140°F, which is hot enough to scald. A mixing valve keeps delivered water at a safer temperature. If you’re unsure about pressure ratings or code requirements for your area, consult a licensed plumber before connecting to a vehicle or cabin supply.
Step 5: Test the System Before You Leave
Fill the system at home, check for leaks around every fitting and seam, and confirm the relief valve operates. Leave it in the sun for a full day and record the outlet temperature at mid-afternoon. A well-built batch heater on a clear summer day should reach a comfortable shower temperature, though exact performance depends heavily on your location, season and cloud cover.
Common Mistakes to Avoid
- Undersizing the tank. Running out of hot water on the second day is the most common complaint.
- Skipping insulation on the sides and bottom. Heat loss through the back of the box can cut performance noticeably.
- Omitting a mixing valve. Unmixed hot water at the tap is a real scald risk.
- Using non-UV-rated plastics or sealants. They crack and degrade within a season or two of sun exposure.
- Failing to drain before freezing weather. Water left in the collector can burst tubing or fittings overnight.
- Forgetting to level and secure the collector. Wind can tip or damage an unsecured unit on the road.
Tips for Better Performance on the Road
- Park with the collector facing south in the Northern Hemisphere and avoid shade from trees or your vehicle.
- Tilt the collector to your latitude, and adjust it seasonally if you stay in one spot for a while.
- Draw water in the afternoon, when the tank is hottest, rather than first thing in the morning.
- Pair the system with a backup option, such as a small propane or electric heater, for cloudy stretches.
- Keep a spare seal kit and a few extra hose clamps in your gear box.
Recommended gear
Insulated water containers help the collector retain heat between uses, and a thermal mixing valve is the single most important safety part of any setup. A small 12-volt pump can move water through a pumped collector, while a quality pressure gauge lets you verify the system before every trip.
- A thermal mixing valve, which prevents scalding and is essential for any hot-water system at the tap. View on Amazon
- A 12-volt diaphragm pump, useful if you add a pumped collector loop to move water between the collector and storage. View on Amazon
- A pressure gauge with a relief valve, for testing seals and confirming the tank is safe before you travel. View on Amazon
- Rigid foam insulation board, which keeps heat inside the collector box and reduces overnight losses. View on Amazon
FAQ
Can a camping solar hot water system work on cloudy days?
It will produce less heat, and often not enough for a hot shower. Store more water than you need for one day and keep a backup heater ready for overcast periods.
How hot does the water get?
On a clear, warm day, a well-insulated batch heater can reach temperatures high enough for a comfortable shower. The exact temperature depends on season, latitude, cloud cover and tank design. A mixing valve keeps delivered water at a safe level.
Do I need a pump?
A simple batch heater does not need one, because water sits in the tank and heats in place. A pump becomes useful if you run a separate collector and storage tank, or if you need to move water into the collector.
What is the best tilt angle?
A common rule is to tilt the collector to your latitude, with a minimum of about 30 degrees for most of the continental US. Adjust for the season if you stay in one location for several weeks.
Can I use the system in freezing weather?
Not without protection. Drain the collector and lines when temperatures drop below freezing, or use a freeze-tolerant design with appropriate antifreeze and specifications.
How long does a camping setup last?
Lifespan depends on materials and UV exposure. Well-sealed, UV-rated components can last several seasons, while cheap plastics and sealants often degrade within a year or two.
Is a solar hot water system safe to use with a vehicle’s water supply?
It can be, provided you add a check valve, pressure relief and a thermal mixing valve. If you are connecting to a vehicle’s plumbing, consult a licensed RV or plumbing professional to confirm the connections meet local rules.
Conclusion
A camping solar hot water system is a practical way to get warm water on the road, provided you size the storage correctly, insulate well and add a mixing valve for safety. Start with a simple batch design, test it at home, and add complexity only when you know you need it. With careful planning, a modest setup can cover daily showers and dishes for most trips.
Related reading
- What's the Best Solar Hot Water System? 3 Top Picks Compared (2026)
- What Is the Cheapest Solar Hot Water System? Options and Trade-Offs
- Top 5 Solar Thermal Storage Tanks for Home Hot Water Systems
- Top 4 Service Solar Hot Water System Options Compared (2026)
- Sunbird Solar Hot Water System Prices: What You'll Pay and Why It Varies
- Split Solar Hot Water System Price: What You'll Pay and What Drives It
Ready to choose one?
About Audrey Hayes
Audrey Hayes is part of our editorial team and reviews and edits our solar water heaters guides, checking product details against manufacturer specifications and owner feedback.