By Audrey Hayes
Updated November 2026
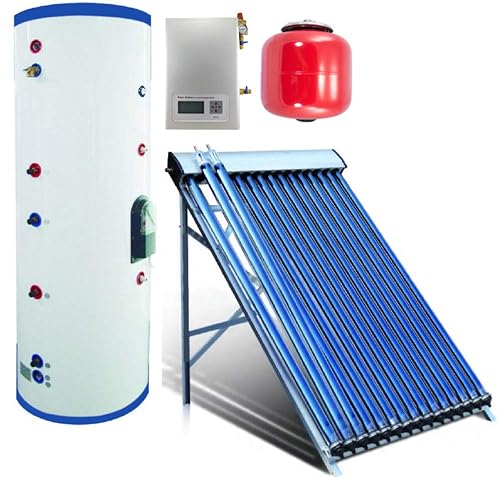
A solar hot water drainback system design works by letting the heat-transfer fluid drain out of the collectors and piping whenever the pump stops, so only water ever sits in the rooftop panels. In this guide you will size the collector array, choose a reservoir and storage tank, lay out piping with the right slope, and check the controls so the system drains reliably every night and freeze-protects itself without antifreeze. Work through each step in order, because the pitch of the piping and the position of the reservoir depend on decisions you make early.
How a Drainback System Differs From Other Designs
In a closed-loop glycol system, the collector loop holds antifreeze under pressure at all times. A drainback system uses plain water in the storage tank and a separate, unpressurized drain-down reservoir. When the pump runs, water circulates from the tank up through the collectors and back down. When the pump shuts off, gravity returns the water to the reservoir, leaving the collectors and exposed piping empty. Because no fluid is standing in the panels during freezing weather, the design protects against frost without chemical additives. The trade-off is that every pipe must slope continuously back toward the reservoir, and the pump has to lift the fluid from a low point, which shapes almost every design decision that follows.
Step 1: Estimate Your Hot Water Load
Start with how much hot water your household uses per day. A common planning figure is around 20 to 25 gallons per person per day for typical residential use, but your own habits matter more than a generic number. Multiply the daily gallons by the temperature rise you need. For example, heating 60 gallons from 50°F to 120°F requires roughly 70°F of rise, and the energy needed scales with that difference. Use this load to decide the tank size and the collector area, not the other way around.
Step 2: Size the Collector Array
Most drainback designs use flat-plate or evacuated-tube collectors. Manufacturers publish the gross and aperture area of each panel, and your design should be based on the figure the manufacturer specifies for thermal performance. A widely used rule of thumb for domestic hot water is one square foot of collector per gallon of daily use in moderate climates, adjusted up for cold or cloudy regions and down for sunny ones. Treat this as a starting estimate and confirm it against local solar resource data and a sizing calculation from a qualified designer.
Also check that the array fits your roof. Note the orientation (south-facing is standard in the Northern Hemisphere), the tilt angle (a common starting point is the site latitude, adjusted for the season you most want output), and any shading from trees, chimneys or neighboring structures between roughly 9 a.m. and 3 p.m.
Step 3: Choose the Drain-Down Reservoir and Storage Tank
The drain-down reservoir holds all the water that drains out of the collector loop. Its volume must equal or exceed the total fluid content of the collectors plus the piping on the roof. Collector manufacturers list the fluid capacity of each panel, so add those figures together, add the volume of the rooftop piping, and size the reservoir with a margin of 10 to 20 percent. Many installers place the reservoir at or just above the level of the storage tank, so the drained water can flow back by gravity without the pump working against a long vertical lift.
Storage tanks for solar thermal use are usually insulated and built to hold a heat exchanger or a dedicated solar coil. For background on tank options, see Top 5 Solar Thermal Storage Tanks for Home Hot Water Systems.
Step 4: Plan the Piping Layout and Slope
Slope is the single most important element of drainback design. Every horizontal run of pipe must fall continuously toward the reservoir, with no low points where water can trap and freeze. Common guidance is a minimum fall of about 1/4 inch per foot, though many installers aim higher to make drainage reliable. Keep the number of elbows low, use sweeping bends where possible, and avoid loops that rise and fall between the collectors and the reservoir.
The supply line from the reservoir to the collectors is the pump’s suction side and the return line brings water back down. Size the lines for the flow the pump will deliver, typically a flow rate that produces a modest temperature difference across the collectors. Oversized pipe slows the system and undersized pipe raises pump energy use.
Step 5: Specify the Pump and Controller
Drainback pumps must be rated for the total dynamic head, which is the vertical lift plus friction losses in the piping. A small, low-head circulator is usually sufficient for residential loads, but calculate the head before choosing one. The controller reads the temperature at the collector outlet and the storage tank, starts the pump when the collectors are sufficiently hotter than the tank, and stops it when the difference falls below a set point. A well-designed controller also includes freeze protection logic that runs the pump briefly when temperatures approach freezing so the collectors drain fully.
Step 6: Add Air Handling and Venting
Because water drains out and air fills the collectors, the system needs a way for air to enter and leave without pulling in dust or insects. Install an air vent at the high point of the collector loop and make sure the reservoir is vented to atmosphere. Air eliminators at the top of the loop help remove trapped air during startup. Poor venting is a common reason drainback systems gurgle or fail to prime, so inspect this detail on every build.
Step 7: Check Freeze Protection and Insulation
Insulate all exposed piping with UV-resistant insulation rated for outdoor use, and protect the reservoir and tank from freezing in unheated spaces. The drainback design itself protects the collectors, but any water left in exposed lines or the reservoir can still freeze. Plan the routing so the most exposed runs are short, and document the expected minimum temperatures for your location.
Materials and Tools Checklist
- Collector array with mounting hardware and roof flashings
- Drain-down reservoir sized to the total loop volume plus margin
- Insulated storage tank with solar heat exchanger coil
- Copper or cross-linked polyethylene piping sized for the flow rate
- Low-head circulating pump rated for calculated total dynamic head
- Differential temperature controller with freeze protection
- Temperature sensors and thermowells
- Air vents, check valves and isolation valves
- UV-resistant pipe insulation and weatherproof jacketing
- Pipe cutters, soldering or press tools, levels and a digital angle finder
- Pressure gauge and drain valves for commissioning
Step-by-Step Commissioning Summary
- Confirm the reservoir is positioned at or above tank level and vented.
- Check that every horizontal pipe run slopes continuously toward the reservoir.
- Fill the tank and prime the pump, then bleed air from the collector loop.
- Start the controller in test mode and confirm the pump runs when the collectors heat up.
- Stop the pump and verify that the collectors drain fully into the reservoir.
- Record temperatures and flow for the first few days and adjust the set points.
Sizing Reference Table
| Design Factor | Typical Starting Point | What to Check |
|---|---|---|
| Daily hot water use | Per-person estimate, adjusted to actual habits | Metered or measured household use |
| Collector area | Roughly one square foot per daily gallon, moderate climate | Local solar resource and manufacturer data |
| Piping slope | At least 1/4 inch per foot | No low points or trapped water |
| Reservoir volume | Total loop fluid plus 10 to 20 percent | Collector and piping fluid capacities |
| Pump head | Lift plus friction loss | Pump curve at the calculated flow |
Common Mistakes
- Running horizontal pipe without enough fall, which leaves water trapped and freezes.
- Placing the reservoir too low, so gravity drainage is incomplete.
- Skipping air vents, which causes noise, air locks and poor pump performance.
- Undersizing the reservoir, so the system overflows or fails to drain fully.
- Choosing a pump without calculating total head, leading to low flow.
- Leaving insulation off exposed sections or using indoor-rated jacketing outdoors.
Tips for a Reliable Build
Draw the full piping isometric before cutting any pipe, and mark the slope on it. Use a digital angle finder to check fall as you go rather than relying on eyeballing. Test the drain-down action on a sunny day and again on a cold night, because the system’s real behavior shows up under the conditions it actually faces. For context on how drainback compares with other designs, see 4 Best Drainback Solar Hot Water System Options Compared (2026).
Recommended gear
- A digital angle finder helps you verify the continuous fall of the piping before anything is fixed in place. View on Amazon
- A low-head circulator pump matched to your calculated head keeps flow steady without oversizing the system. View on Amazon
- A differential temperature controller with freeze protection automates pump operation and drain-down timing. View on Amazon
- UV-resistant pipe insulation protects exposed lines from sun damage and heat loss outdoors. View on Amazon
FAQ
Does a drainback system need antifreeze?
No. The collectors drain empty when the pump stops, so plain water can be used in the storage tank and loop. The freeze protection comes from the drain-down action rather than from chemical fluid.
How much slope does drainback piping need?
A common minimum is about 1/4 inch of fall per foot of horizontal run. Many installers design for more to make drainage more reliable, especially in cold climates.
Where should the drain-down reservoir go?
Place it at or just above the storage tank level, so drained water returns by gravity. It must be vented to the atmosphere and sized to hold the full fluid volume of the collectors and piping.
Why does my drainback system gurgle?
Gurgling usually points to air in the loop or inadequate venting. Check the high-point vents, confirm the reservoir is open to air, and make sure the pump is not drawing air through a leak in the suction line.
Can I use a drainback system in a freezing climate?
Yes, drainback is well suited to freezing climates because the collectors empty when the pump stops. Exposed piping and the reservoir still need insulation and protection from freezing, and the controller’s freeze logic should be set correctly.
How do I know the collectors have fully drained?
After the pump shuts off, you can observe the sight glass or the reservoir level and check the collector outlet for flow. Persistent standing water in the panels suggests insufficient slope or a blocked return line.
Should I hire a professional for the design?
Consult a qualified solar installer or designer for the final sizing and any work involving roof penetrations, structural loads or electrical connections. Local codes and permits may also apply.
Conclusion
A sound solar hot water drainback system design starts with an honest load estimate and a collector array sized to match it. Piping slope, reservoir placement and venting determine whether the system drains and protects itself reliably, so give those details the most care. Verify each step during commissioning, and check performance across both sunny and cold conditions before you consider the job finished.
Related reading
Ready to choose one?
About Audrey Hayes
Audrey Hayes is part of our editorial team and reviews and edits our solar water heaters guides, checking product details against manufacturer specifications and owner feedback.