By Audrey Hayes
Updated November 2026
A summer solar hot water system can cover most or all of a household’s hot water needs during the warmer months, often with little or no backup heating. In this guide you will learn how to estimate summer demand, size collectors and storage, choose a mounting location, and set up the system so it performs well through the longest and sunniest days of the year. You will also get a materials checklist and a list of mistakes that cause summer overheating and wasted sunlight.
How a Summer Solar Hot Water System Works
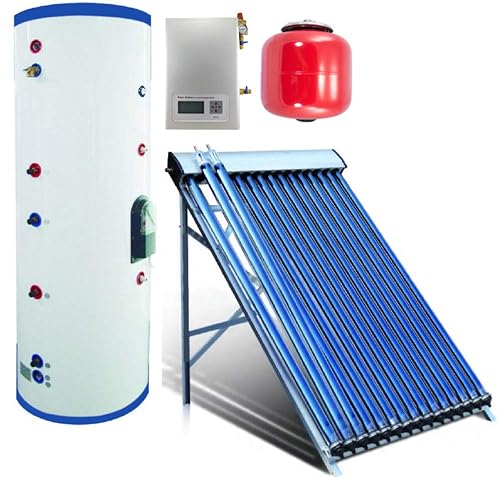
Most residential systems use flat-plate collectors or evacuated tubes to absorb sunlight and transfer that heat into a fluid, which then carries it to a storage tank. In a passive or thermosiphon layout, the tank sits above the collector so warm water rises naturally. In an active system, a small circulator pump moves the fluid, and a controller starts the pump when the collector is hotter than the bottom of the tank by a set margin.
Shopping for one? See our guide: 6 Best Indirect Solar Hot Water System Options for Homes (2026).
Summer is the easy season for this kind of system. Days are long, the sun is high, and the sun’s angle means that even moderate roof pitches receive strong irradiance. The challenge in summer is not making enough heat. It is managing the excess, which is why overheating protection matters more in July than in January.
Step 1: Estimate Your Summer Hot Water Demand
Start with your actual usage rather than a rule of thumb. A common planning figure for a household shower is roughly 10 to 20 gallons per person per day at typical mixed temperatures, but usage varies widely. Track your hot water use for a week if you can, or check your water heater’s tank size and recovery rate as a starting reference.
Useful planning numbers
- A standard shower often uses 1.5 to 2.5 gallons per minute depending on the showerhead.
- A dishwasher cycle may use 3 to 6 gallons of hot water, depending on the model and settings.
- A clothes washer on a hot cycle may draw 5 to 15 gallons, depending on the machine and load size.
Summer demand is often lower than winter demand because incoming cold water is warmer, so less energy is needed to reach your setpoint. That is good news for solar sizing, since a summer system can be sized more for daily peak use than for worst-case winter days.
Step 2: Size the Collector Area and Storage Tank
A widely used rule of thumb is to allow about 0.5 to 1 square meter of flat-plate collector area per person in a summer-focused system, though this varies by climate, roof orientation and tank size. Evacuated tube systems typically need fewer square feet of collector area for the same output because they retain heat better, but they are sized using the same demand-based logic.
Storage should generally hold about one to two days of typical hot water use. A tank that is far too large can keep water lukewarm and reduce the effective temperature delivered on the first morning shower. Manufacturers usually publish performance tables that relate collector area and tank volume to output in specific climate zones. Use those tables rather than guessing.
Step 3: Choose and Prepare the Mounting Location
Orientation and tilt matter. In the Northern Hemisphere, a south-facing collector with a tilt roughly equal to your latitude gives strong year-round performance. For a summer-leaning system, a slightly lower tilt can capture more high-sun energy, though the gain is modest. Avoid shading from trees, chimneys and neighboring buildings between about 9 a.m. and 3 p.m. in summer.
Check the roof structure before mounting anything. A loaded collector adds weight, and the attachment points must reach the rafters or a structural member. Plan for flashing that is rated for your roof covering, whether that is asphalt shingle, metal or tile.
Step 4: Plumb the System
Use copper, PEX rated for solar temperatures, or the piping specified by your collector manufacturer. Solar loops can reach well above 200°F on hot days, so confirm your pipe and fittings are rated for that. Insulate all hot lines and the loop piping with high-temperature insulation. Exposed uninsulated pipe is one of the most common sources of avoidable heat loss.
Include a pressure relief valve sized for the system, an expansion tank, isolation valves, and a check valve where the design requires it. Drain-back and closed-loop designs have different requirements, so follow the layout in your manufacturer’s manual.
Step 5: Install the Controller and Sensors
A differential controller compares the temperature at the collector with the temperature near the bottom of the storage tank. When the collector is warmer by a set difference, usually around 10 to 15°F, the pump runs. Mount the collector sensor on the absorber or outlet pipe, not on the surface of the glazing. Mount the tank sensor in a well or on the pipe at the lower third of the tank, following the manufacturer’s position.
Set a high-temperature limit on the tank so the system does not overheat stored water beyond what your tank and fittings can safely handle. Many systems also include a collector overheat setting that circulates water to dissipate heat when the tank is full.
Step 6: Plan for Summer Overheating
This is the step most people underestimate. On a clear July afternoon with a full tank, a collector can reach stagnation temperatures that damage seals, degrade fluid and stress components. Options include:
- A high-limit thermostat that stops collection when the tank reaches a set maximum.
- A drain-back design that empties the collector when the pump stops, reducing stagnation risk.
- Heat dump or radiator circuits that shed excess energy in a controlled way.
- Partial shading or a cover on the collector during extended idle periods, if the manufacturer allows it.
Always confirm which overheating protection your collector and controller are designed to use. Mixing components from different designs can void warranties and create hazards.
Step 7: Commission and Test the System
Fill and purge the loop according to the manual, checking for air pockets that can block flow. Test pressure, then run the pump and watch the flow meter or temperature readings. On a sunny day, the collector outlet should warm faster than the tank, and the pump should cycle on and off as conditions change. Confirm that the relief valve is working by checking for any leaks and making sure discharge is routed safely to a drain.
Materials and Tools Checklist
- Flat-plate or evacuated tube collectors matched to your demand estimate
- Storage tank sized to one to two days of use
- Mounting rails, flashing kits and roof attachment hardware
- Copper or solar-rated PEX piping and fittings
- High-temperature pipe insulation
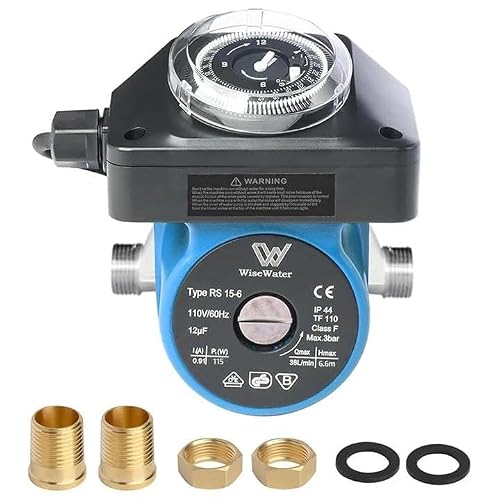
- Circulator pump and flow meter (for active systems)
- Differential controller and temperature sensors
- Pressure relief valve, expansion tank and check valve
- Propylene glycol solar fluid (for closed-loop designs)
- Pressure gauge, fill station and drain valve
- Basic tools: drill, pipe cutters, soldering kit or PEX crimp tool, level, and tape measure
Common Mistakes
- Oversizing the collector without adding storage or overheating protection, which wastes heat on sunny days.
- Ignoring shading from trees that grow in over several summers.
- Leaving hot lines uninsulated, which can cost a surprising share of collected heat before it reaches the tap.
- Placing the tank sensor too high, so the pump runs when the bottom of the tank is still cold.
- Skipping a pressure relief valve or routing its discharge into a dead-end pipe.
- Installing a glycol system without checking fluid concentration and freeze protection for your local climate.
Tips for Better Summer Performance
- Run a hot water use log for one week before finalizing tank size.
- Set the tank high-limit to a temperature that meets your safety needs and avoids unnecessary stagnation.
- Use tempering valves at fixtures if your system stores water hot enough to pose a scald risk.
- Check the controller and sensors every spring before the high-demand season begins.
- Keep a simple log of pressure and fluid level to catch slow leaks early.
Recommended gear
Most of the components in a summer system are specialized and are best matched to a specific collector design. The items below are general accessories that support the setup described above.
- A differential solar controller helps the pump start only when there is useful heat to collect, which reduces wasted runtime on cloudy days. View on Amazon
- High-temperature pipe insulation keeps collected heat from being lost in exposed runs, especially in attics and crawl spaces. View on Amazon
- A propylene glycol solar fluid, premixed or concentrate, is used in closed-loop systems to protect against freezing and corrosion. View on Amazon
- A PEX crimp tool kit is useful if your loop uses PEX rated for solar temperatures and you prefer not to solder copper. View on Amazon
FAQ
Can a summer solar hot water system provide all my hot water in July?
In many sunny climates, a properly sized system can supply most or all hot water during summer. Cloudy stretches and high household demand may still call for backup heating, so plan for it.
Do I need antifreeze in a summer-only system?
Freeze protection depends on your climate, not the season you use the system. If nighttime temperatures drop near freezing where you live, a closed loop with glycol or a drain-back design is usually recommended.
How hot can the water get in a solar tank?
On sunny days, storage temperatures can exceed normal household settings. A tempering valve and a properly set high-limit control are needed to keep water at safe delivery temperatures.
Should I face the collector directly south?
In the Northern Hemisphere, south-facing is generally best. Within about 20 to 30 degrees of south, performance usually remains good, though the exact loss depends on your site.
How often should I service the system?
Many manufacturers recommend an annual check of fluid, pressure, pump operation, controller settings and seals. Follow the schedule in your manual.
Can I install a summer solar hot water system myself?
Some homeowners with plumbing and roofing experience do DIY installs, but roof penetrations, gas or electric backup connections and pressure equipment call for care. Consult a licensed professional for code-required work and any roof or electrical connections.
What happens if the power goes out?
Passive or drain-back systems can keep operating without power in some designs, while active pumped systems stop circulating. Check your system design and backup plan.
Conclusion
A summer solar hot water system is one of the most forgiving solar setups to run, but only if it is sized, sited and protected correctly. Estimate your demand, match collector area and storage to it, and plan for overheating from the start. With good insulation, a reliable controller and a regular check each spring, the system can deliver free hot water through the long summer months.
Related reading
- What's the Best Solar Hot Water System? 3 Top Picks Compared (2026)
- What Is the Cheapest Solar Hot Water System? Options and Trade-Offs
- Top 5 Solar Thermal Storage Tanks for Home Hot Water Systems
- Top 4 Service Solar Hot Water System Options Compared (2026)
- Sunbird Solar Hot Water System Prices: What You'll Pay and Why It Varies
Ready to choose one?
About Audrey Hayes
Audrey Hayes is part of our editorial team and reviews and edits our solar water heaters guides, checking product details against manufacturer specifications and owner feedback.